Posts

Wall Deco, I love my dog and my dog loves me!

Image
I never know they are such a loyal pal until I met her. I didn't know they love us till such an extend that they forget about themselves. My gal, my lifelong lover, Muffin, our beautiful house pet! Here goes a wall deco, from a discarded wooded crate, dedicated to our one and only Muffin! WOof woOf!! A special request from my son, he's been pestering me ever since she came into our family and become an important part of our lifes. It is a very easy craft to try your hands on. You can find any boards around to make this. Just prime it with any coat of left over wall paint or acrylic paint, you can choose the colour you prefer. While letting it to dry, take time to choose a photo that will look great as a silhouette, front or side view. Use a pencil to draft lightly on the board after it dries. Paint it with your desired color. Lastly, the quote. You can either print a copy to do the transfer on the board or just draw it with free hand. For mine, I typed out with the font...

DIY Bicycle Rims Light Chandelier

Image
My dinning table lighting has been sitting there 'shadeless' for quite a while :P And as my son was into his little bike business recently, I got hold of two bicycle rims which are heading their way to the thrash bin. I thought I must as well kill two birds with one stone, lol. Meaning, I can recycle and spice up the dining area at one go! A Chandelier! Yes, how much I've dreamt to own one chandelier light and who knows? All it takes is a will to make it! "Will Power" - willingness to MAKE it and it will happen, ahem! This is yet to be the completed outlook, but the work in progress pics, as I still need to collect some more recycle 'parts' to give it a final touch. The bicycle rims were used as the hanging rims of this chandelier. The holes for the spokes make it just perfect for this re-purpose project. Different sizes of circles are cut out from old CDs with a soldering iron, ...

Polymere Clay Miniatures, Bread and Donuts

Image
Has been in love with miniatures these recent years but did not blog about it in any of my post. Here it goes... When I had my first hands-on experience to work with polymere clay around three years ago, I was totally in love with it. Yes, I'm truly in love with this durable, and at the same time flexible clay. The color variations that you can create with polymere clay can turn out very realistic. By looking at the images above you can tell it, lol. There isn't any long hours of firing needed to obtain that hardness, the oven baked clay just need around 130 degree for a short 20 minutes of baking. Convinced? By the way, even my niece thought the donuts was real when I whatsapped her the picture telling her I was on my way to send her some, teehee.

DIY Plushie Bear

Image
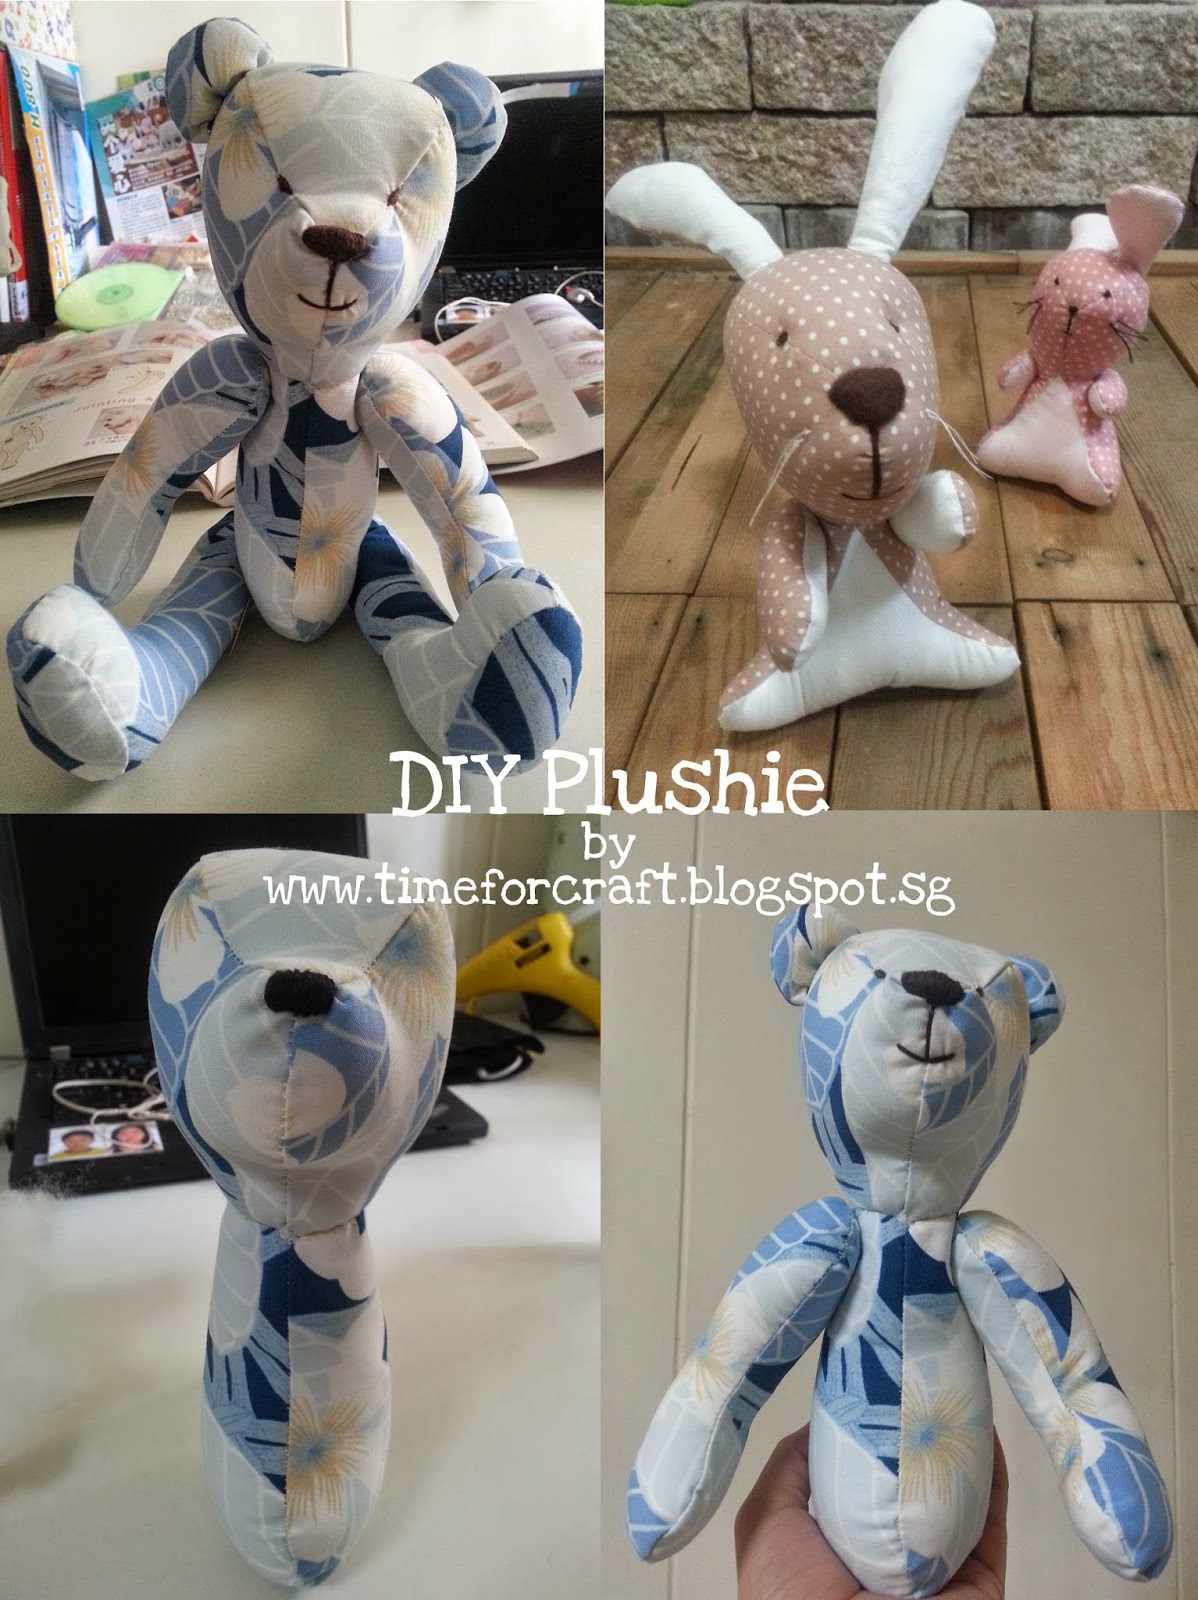
My prototype, a bear plushie! Never did I have imagined I could ever make a bear successfully with my hands, frankly, I can still remember clearly how my first diy 'doll' (hopefully it is) looked like when I tried to make one at around 6 years old or maybe younger. A mixture of unmatched scraps, done with jagged lines of hand sewn stitches, holding the pieces together to look like one. A stick I picked up from somewhere hardly hold the head to the body to avoid it from dropping. Little did I know about proper sewing, all I wanted was to own a doll, and that was how I started DIYing my way till this age. It's amazing, when you really want something you'll do something about it. And when a customer's request got in a few months back, I started asking myself why can't I do it, maybe it's time for me to make a doll/bear again... I went to the library to research on the making of bears, studied the steps and take n...

Pressed Leafs Candle Holder

Image
In this project, I injected the idea of making pressed flowers without the days of waiting for the flower to get dry with the help of silicon gels. Here I repurpose a few left over plastic containers with some unique leafs I can find on the roadside and a few pieces of transparent wrapping papers that comes with your new shoes purchased. Yes, I do keep those wrappers especially the white and clear ones for tracing and paper marche purposes, they are very useful when you need it. Fresh from the ground, cut the leaves into the required length needed for the container. You may need to reduce the thickness or slice it thinly, if the leaf or stalk is very thick and quite stiff to stick on the container later. When this is done, plan the layout of your design where you want to place the leafs. Use a brush to spread enough white glue on the container where you want to place the leafs. Don't have to worry about the mess of paints here and there, as you'll be spreadi...

Felt Hair Pin Design

Image
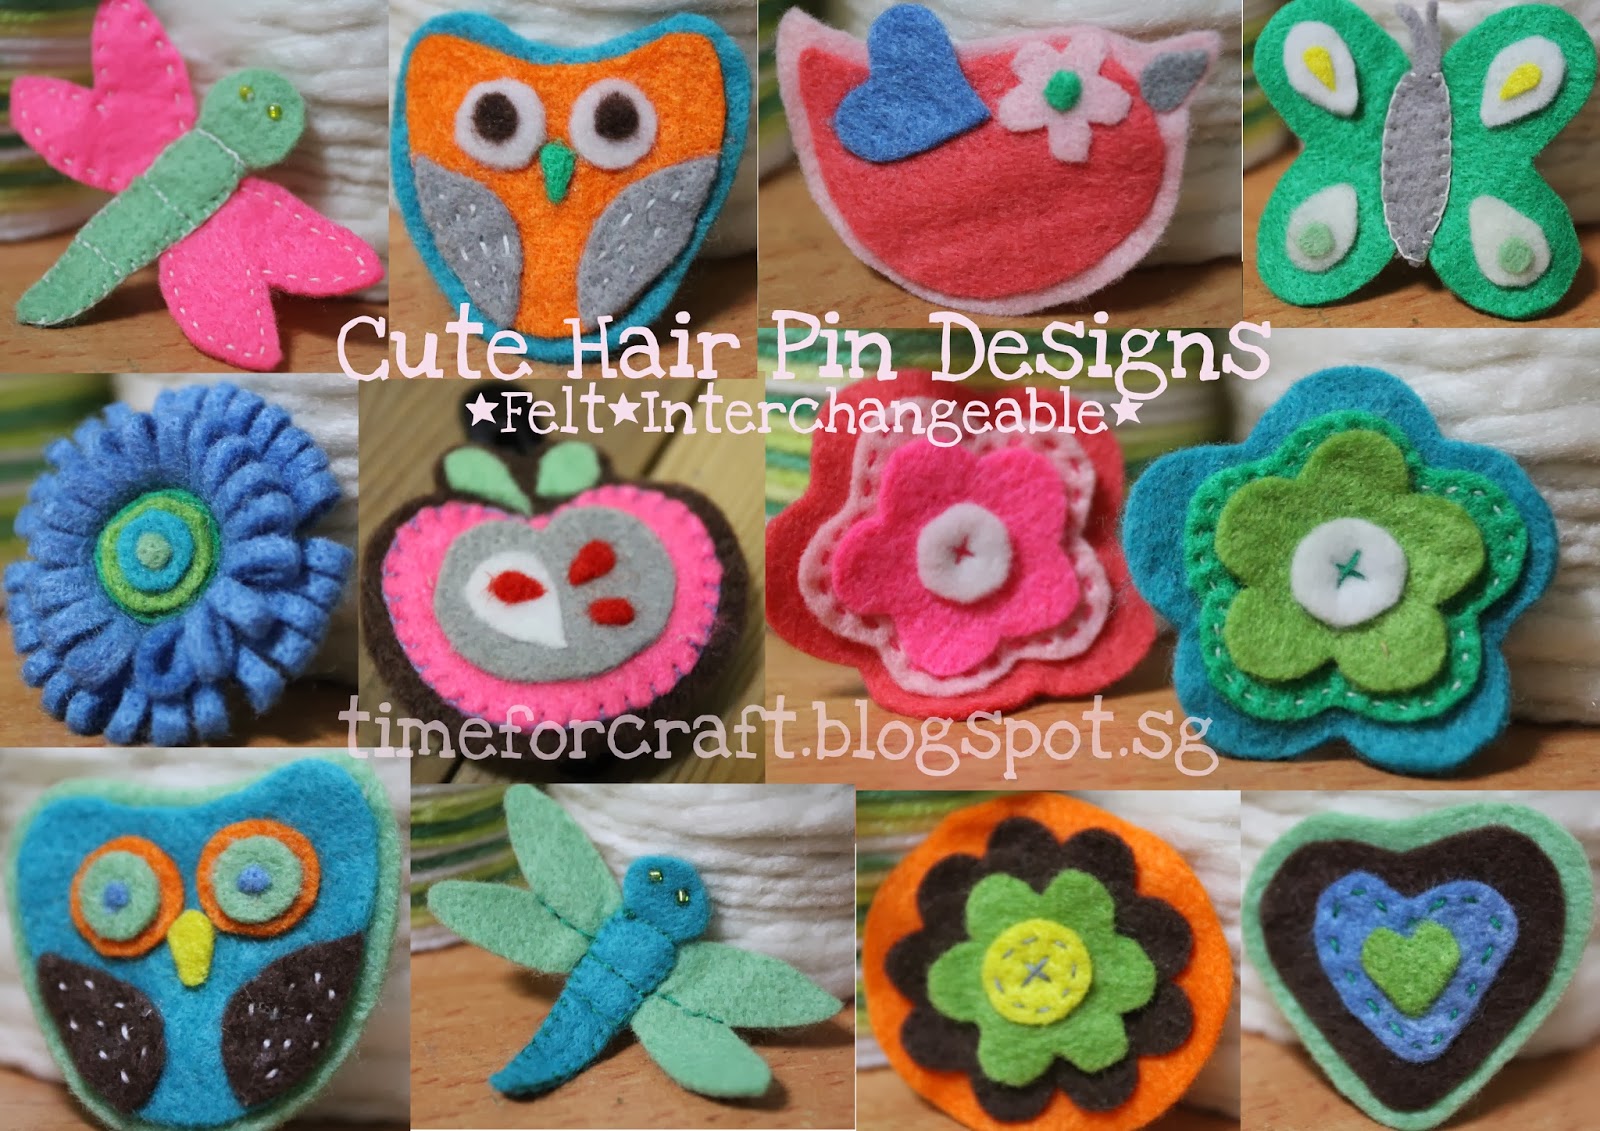
As I was on the 'felt' mood recently and a number of black hair pins were left behind to put into better use, I had this idea to come up with a set of interchangeable cute felt design for little gals to pin onto their hair. You just need to slip the hair pin into the hook attached at the back of the design, and there you go!

Felt Dragonfly Pencil Holder

Image
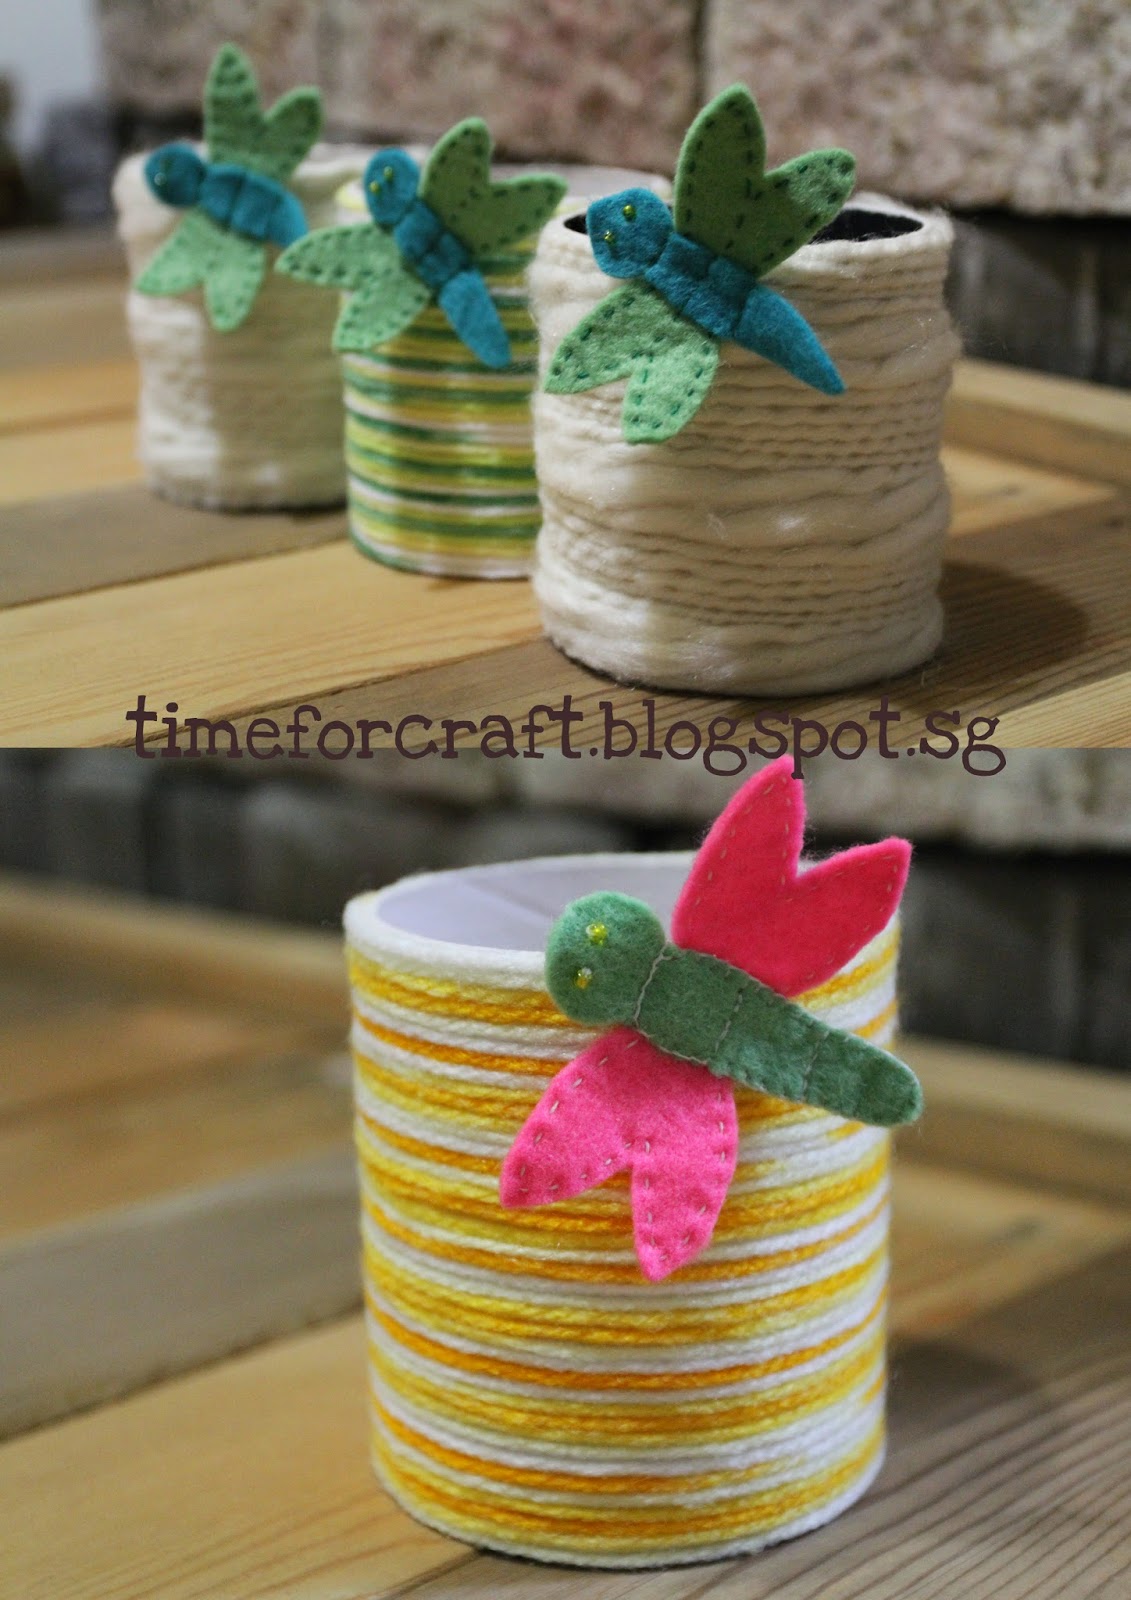
I'm pretty satisfied with these pencil holders I've made from coloured felt pieces and a roll of yarn which I bought at Daiso, a $2 dollars departmental store in Singapore. As usual, I used toilet paper roll tube coupled with a round piece of cardboard as the base. These large commercial type of toilet paper roll tube are often end up in the trash of public toilets of commercial buildings or shopping centres. As I can't tolerate to leave these to waste, I've collected a number of them waiting to be my next makeover star! Take my words, they were from the cleaner aunties who reserved them for me and not taken from the trash ok:> Be inspired with the endless possibilities to make use of our trash! Until then, see you!