Posts

Showing posts from 2009

Wood Burning Art

Image
Pyrography (wood burning) means 'fire drawing' in Greek. It is the art of burning images on wood, paper, leather or dried hard gourds that results from the controlled application of a heated object which has advanced throughout the years. Instead of the old ancient way of using a fire stick, I'm using a soldering iron instead. These are two pieces of wood burning projects I did around 15 years ago. It used to be hanged at my dining area framed up as decorations, two pieces of thin plain wooden boards. I started out by sketching/outlining the pictures or theme on the board using a pencil. After all the planning and allocation is done on the board, the fun part begins, the soldering time! By soldering on the board, we are creating permanent burn marks and a large range of tones and shades can be achieved. Various type of tip, the temperature of the soldering iron at the beginning when you turn it on or after prolong usage, and the...

Sony Creative Science Award 2009 Merit Award

Image
This was a great achievement for both me and my son for the year 2009! The toy we submitted for the Sony Creative Science Award 2009 , won Merit Award on 22 July 2009. The details about our submission is in this previous post here . It has been 2 months of waiting since we submitted the toy to the school. Out of 3,423 entries , from 101 schools , it was not simply luck to get us there. We jumped with joy when the school teacher informed us of the good news. During the prize presentation day, we had a chance to look at a number of great works from children at different primary school levels, some with the involvement of either the teacher or their parent, some have invested more on the materials while others insisted on recycled materials. It's really interesting just by admiring at their work and how, at a young age, they were presenting their work to the public. I sincerely hope that there are more of such platform for the younger generatio...

Mid Autumn Festival, Dragon Puppet Making Competion

Image
Just received a leaflet from the school to participate in a dragon puppet making for the upcoming Mid Autumn Festival celebration 中秋节. As the lantern making competition held at Chinatown Point has been put on halt, I decided to guide on this project. Basically, the instructions given by the school to make this puppet is very simple. If we were to follow it exactly, I'm sure 80% of the dragons will look almost alike. Really, it is not so much of whether this puppet we made will win in the competition a not, it is the passion in me to make a difference in every project I committed doing. We had a brainstorm session before we put everything in place. But, I got to really thank myself for the huge collections of recycled materials. If all these are not within reach, what magic can I perform? Golden & silver foil ice-cream wrappers, fresh milk carton box, bottle caps, polyfoam fruit net (the pink dragon body) etc.; all these are simply wastes that end up in the b...

Toy Competition

Image
It was a competition hold by the school to make a toy from recycle materials. After attending the Sony Creative Award Prize Presentation held in July, we certainly gained more insight on the awarded toys children have made. For this reason, I wanted more contribution from my son this time. So he suggested on a number of designs, drew it out and explained to me on how to play with them. With all his ideas, I brought in all the 'free' materials that I have, we fixed them up and tested on the toy several times. We used toilet paper rolls and some bottle caps on the trial run. It was until we used the little green balls recycled from chinese medicines as one of the materials, then the idea of a war site striked our mind. Initially, the bomb loader that we came up with was unable to 'work' probably. We opted out a number of possibilties and finally decided to use two containers, a chopstick and a rubber band to do the job. It was an enjoyable process making this toy. The wh...

Traditional Toy DIY Session 2009

Image
Any idea what these are? Those children are busy filling tiny little bags with beans. Yah! They were making their own five stones and chapteh during their September Holiday Craft Session. Frankly, I don't have the time to work on these two projects before hand. Base on instinct, I gathered the materials I had and headed straight to the centre to teach the craft. The original technique to make five stones needs some basic sewing skill, but it's a big task for children around 4 years old to handle needle and strings. So I changed the whole process into a easier and faster way for them. That's to use UHU glue to put the two tiny pieces of cloth together. Easy Right?? The children filled up each bag with beans after the glue on the sides dried up and sealed it up again with glue on the last opening... All it takes is about 5 to 10 mins to get it all done. The children were so eager to play with their very own five stones, they started playing with it immediately even before t...

Our Treasure Farm

Image
This was a rather big project that I took on about three or four years back, when my son was around 4 or 5 years old. It was a request from him to make him a farm. I remembered I really have no idea on what to make. It was not something that came out of a sudden. I done it parts by parts, trial and error and it took me many months to complete the whole thing. It is my unique way of showing my love to him to make him such a memorable toy. And it was until recently, when he took it out and started playing with it again, that I realised he treasured it so much. He remembered how to assemble them and where each and every item should be placed. He even remembered his own set of farm rules... As you can see from the pictures, it was really fun here, you can actually harvest the carrots if you wanna. There's a water well near the farm house. A windmill that can turn... ... Besides all the toy animals and trucks used in there, the rest are all recycled materials. As what I've alway...

Fund Raising Day

Image
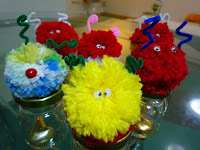
After working on this project for the whole of August, we are finally set for the fund raising. With the help of our fellow counsellors, we managed to rush out about 80 pieces of the finished products, just in time for the sales! The whole process was time consuming and lots of hard work. But I was rewarded when I saw the students involved in this program enjoyed the whole process... The 3 hours of sales was very successful and the students managed to raised about a hundred bucks to the charity. I was very impressed by the look of 'customers' walking away with our handmade stuffs. I can say it's all worthwhile and I look forward to another meaningful contribution to a charity as a volunteer.

Charity Funding (Part III)

Image
Looks like there're lots of touching up need to be done and there's a short of time before the fund raising day. I brought back some of the unfinished work left over by the students and started the patching up here and there. On the other hand, few of the counsellors did their part at their office, rushing out the rest of the products. All thanks to them! I digged out few of my coconut shells, painted them, and turn them into decorated plant pots. Hopefully, it will turn out to be a 'sellable' item. Really no idea how the fund raising will end up with, but I'm very glad all of us here did all our best to make this event possible...

Fond Memories

Image
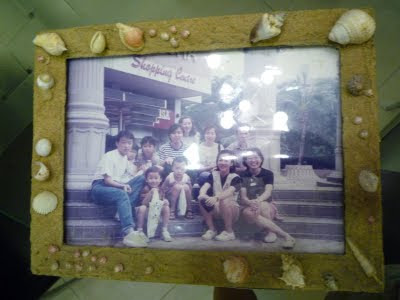
I've probably forgotten quite a number of the things I've made with recycle stuffs. As I visited my dad at his house at Punggol, I found this photo frame which I made many many years ago. It was still attached with a photo taken at that time when my nephews and nieces were just little boys and girls. Times phewwww past! Actually the frame was passed down decades ago from my ah mah. Someone could have dumped it if I've not furnished it with sands and seashells. Looking at it now really reminds me of those fond memories. So, think twice when you're throwing something away. It could be a precious piece of memory to remind you of the days gone by...

Magnet Photo Frame

Image
After attending the craft session at the secondary school for the first time, I've a strong urge to come out with something that will interest the teenager there. I came back home and started staring at my used compact disc for hours. With the objective to reduce reuse and recycle whatever I collected, I finally came up with this idea - A Magnet Photo Frame. Simply making use of a black polyfoam food tray, one compact disc, three magnets and a sheet of plastic transparency. You can frame up your favourite photo on the fridge or display it on your desktop CPU metal casing. It's so wonderful to see another new creation of a mosaic art here...

Charity Funding on my craft

Image
You know? All the while, I've a dream to tie up the areas of my interest with a charity funding project. Yah it's not easy. Remembering how I started volunteering myself at one of the Moral Family Center. The first time was a free distribution of children storybooks. It was donated from the National Library Board to those needy children. There was no connection with my craft, but both me & my son still enjoyed the involvement. It was until I realized a need to set up a blog as my portfolio, showing the things I produced, there I get the chance to expose the collections of the crafts I did. It was a stepping stone for people to know me and get me involved in the teaching of my crafts. This time round I took another great step, that's to teach a group of secondary school students with my gifts craft and thus selling crafts to raise fund for charity. Yes! Much more meaningful than the norm volunteer work. To me, besides the fund raising part that matters, most importantly...